Why Your Garbage Disposal Smells Bad (And How to Fix It for Good)
The Stinky Reality of Garbage Disposals
We've all been there: You flip on the kitchen faucet, hit the disposal switch, and instead of a satisfying grind, you're hit with a wave of foul odor that lingers like an unwelcome guest. As contractors who've installed and repaired hundreds of these units, we can tell you that a smelly garbage disposal is one of the most common complaints we hear from homeowners. It's not just about the food scraps—there's usually more going on beneath the surface.
In this post, we'll dive deep into why your garbage disposal smells, debunk some quick-fix myths, and share pro-level advice on how to tackle the problem effectively. We'll go beyond the old ice-and-lemon routine to explain biofilm buildup, a sneaky culprit that's often overlooked. By the end, you'll have the tools to restore freshness to your sink and know when it's time to call in the pros for a replacement. Let's get that kitchen smelling sweet again.
Common Causes of Garbage Disposal Odors
Before we jump into fixes, it's crucial to understand what's causing that rotten smell. Garbage disposals are essentially mini grinders that chop up food waste before sending it down the drain. But even the best-maintained units can develop odors over time. Here are the top reasons:
1. Food Residue Buildup
The most obvious culprit is leftover food particles that don't get fully ground or flushed away. Starchy foods like potatoes, rice, or pasta are notorious for sticking to the disposal's components. Over time, these bits decompose, attracting bacteria that produce hydrogen sulfide—a gas with that classic "rotten egg" smell.
Pro Tip: Always run cold water for 15-30 seconds before and after using the disposal. This helps wash away debris and prevents clogs. If you're dealing with fibrous or greasy foods (think celery or bacon fat), it's best to avoid them altogether or compost instead.
2. Bacterial Growth and Biofilm
Now, here's where things get interesting—and a bit gross. Biofilm is a slimy, protective layer formed by bacteria, fungi, and organic matter that adheres to surfaces like the disposal's grind ring, impellers, and even the drainpipe. It's not just visible gunk; it's a microbial community that thrives in the moist, dark environment of your sink.
Unlike simple residue, biofilm is resilient. It shields bacteria from water and cleaners, allowing odors to persist. Studies from plumbing experts show that biofilm can start forming within days of regular use, especially if the unit isn't cleaned regularly. That lingering fishy or sewage-like smell? Often biofilm at work.
3. Clogs and Poor Drainage
If your disposal is struggling to push waste through, it creates a stagnant pool where smells brew. This can happen from overuse, incorrect items (bones, pits, or non-food waste), or an aging unit that's lost its edge.
4. Mechanical Issues
Worn-out seals, rust, or motor problems can lead to leaks or improper function, exacerbating odors. If the disposal hums but doesn't grind, debris builds up fast.
Understanding these causes helps you target the right solution. A quick sniff test: If the smell worsens when you run the disposal, it's likely residue or biofilm. If it's constant, check for clogs or hardware faults.
Why the Ice-and-Lemon Trick Falls Short
You've probably heard the advice: Toss in ice cubes and lemon peels, run the disposal, and voilà—fresh scent! While this method can temporarily mask odors and sharpen the blades (a common myth—blades are actually fixed; the impellers rotate), it's like putting a Band-Aid on a broken pipe.
Ice might dislodge some loose debris, and citrus oils provide a pleasant aroma, but they don't penetrate biofilm or address bacterial colonies. In our experience, homeowners who rely on this trick often end up with recurring smells within a week. It's a surface-level fix that ignores the root problem, much like sweeping dirt under the rug.
Don't get us wrong—it's a fine starting point for minor issues. But for lasting results, you need deeper cleaning strategies. Let's explore those.
Tackling Biofilm: Effective Cleaning Methods
To truly eliminate smells, focus on breaking down biofilm and killing bacteria. As pros, we recommend a multi-step approach that's safe, affordable, and DIY-friendly. Always unplug the disposal first for safety—never stick your hand inside!

Step 1: Manual Cleaning
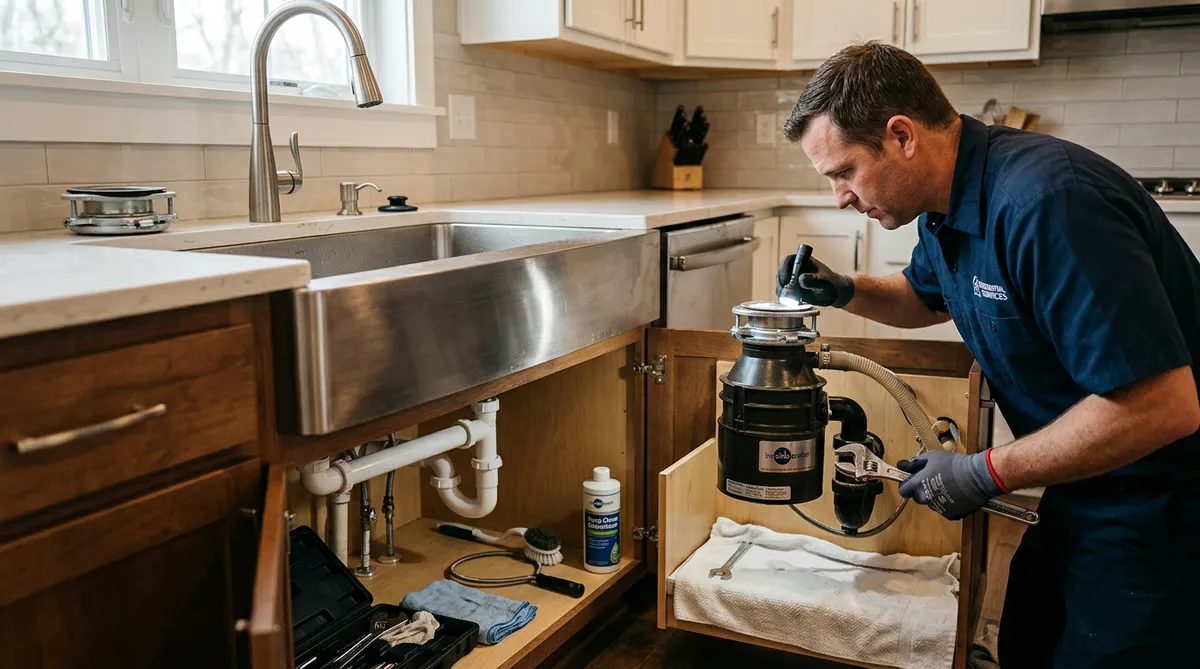
Start with the basics. Use a flashlight and a wooden spoon or broom handle to gently dislodge visible buildup from the grind ring (the stationary part at the bottom). Avoid metal tools to prevent damage. For the splash guard (the rubber flap over the sink opening), remove it if possible and scrub with a toothbrush and hot, soapy water.
Pro Tip: Wear gloves—this can get messy. Rinse thoroughly with hot water to flush out loosened gunk.
Step 2: Natural Biofilm Busters
For biofilm, chemical warfare is key, but natural options work wonders without harsh fumes.
Baking Soda and Vinegar Method: Pour 1/2 cup baking soda into the disposal, followed by 1 cup white vinegar. Let it fizz for 5-10 minutes—the reaction helps loosen slime. Then, flush with boiling water (if your pipes can handle it; check for PVC). Repeat weekly for prevention.
Citrus and Salt Scrub: Go beyond lemons by grinding citrus peels with coarse kosher salt. The salt acts as an abrasive to scrub biofilm, while the peels' acids dissolve residue. Run for 30 seconds, then rinse.
These methods are gentle on septic systems and eco-friendly. We've seen them restore units that smelled like a dumpster in under an hour.
Step 3: Enzyme Cleaners for Stubborn Buildup
If natural remedies aren't cutting it, enzyme-based cleaners are your next line of defense. These products contain bacteria-eating enzymes (like those in Bio-Clean or similar brands) that target organic matter without damaging the unit. Pour a scoop down the drain, let it sit overnight, and run hot water in the morning.
Why enzymes? They digest biofilm at a molecular level, preventing regrowth. Avoid bleach or chemical drain cleaners—they can corrode the disposal's aluminum components and harm your plumbing.
Step 4: Deep Clean the Drain Line
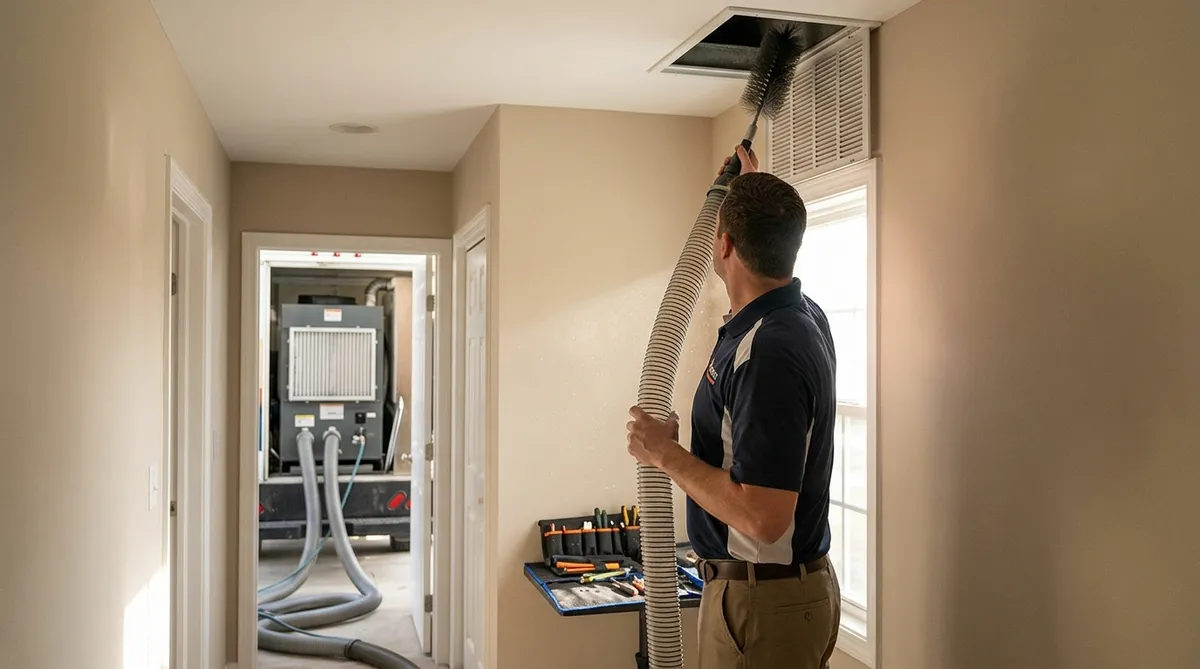
Odors often travel up from the P-trap or pipes. Disconnect the trap under the sink (place a bucket to catch water), clean it with a brush, and reconnect. For further down the line, use a drain snake or call a plumber for hydro-jetting if needed.
Regular maintenance like this—monthly deep cleans—keeps biofilm at bay. Track your routine in a kitchen calendar to stay consistent.
Signs It's Time to Replace Your Garbage Disposal
Sometimes, no amount of cleaning will help. Garbage disposals typically last 8-15 years, depending on usage and quality. Here are red flags that it's time for a new one:
Persistent Odors Despite Cleaning: If smells return quickly, the unit may have internal corrosion or worn parts trapping bacteria.
Frequent Jams or Weak Grinding: Dull impellers can't process waste effectively, leading to buildup.
Leaks or Unusual Noises: Water around the base or grinding sounds indicate seal failure or motor issues. Continuing to use it risks water damage or electrical hazards.
Age and Efficiency: Older models (pre-2010) are less energy-efficient and prone to odors. Upgrading to a modern, insulated unit (like InSinkErator's Evolution series) reduces noise, vibration, and smell issues.
Replacement costs $150-300 for parts and labor, but it's a worthwhile investment for a hassle-free kitchen. As contractors, we always suggest batch-feed models for families—they're safer and grind more thoroughly.
When installing a new disposal, ensure proper alignment with your sink and dishwasher connection. Test it immediately to catch any issues.
Preventive Tips from the Pros
Prevention is easier than cure. Here are our top tips to keep your disposal odor-free:
Use It Right: Only food scraps—no plastics, glass, or grease. Cut large pieces into smaller bits before grinding.
Run It Regularly: Daily use prevents rust and keeps parts lubricated. Idle disposals are more prone to smells.
Odor Absorbers: Place a bowl of coffee grounds, baking soda, or activated charcoal near the sink to neutralize airborne smells.
Professional Inspections: Every 2-3 years, have a plumber check for hidden issues, especially in hard-water areas where mineral buildup accelerates biofilm.
By incorporating these habits, you'll extend your disposal's life and avoid those dreaded kitchen whiffs.
Wrapping Up the Fresh Fix
A smelly garbage disposal doesn't have to ruin your home's vibe. From understanding biofilm's role to deploying effective cleaning tactics, you've got the knowledge to take control. Skip the short-term tricks and invest in thorough maintenance—or a replacement if needed. Your kitchen (and nose) will thank you.