What Really Happens During a Home Plumbing Inspection: Insider Tips from the Pros
Why a Plumbing Inspection Matters for Your Home
Buying a new home or dealing with nagging water issues? A plumbing inspection is one of those behind-the-scenes checks that can save you thousands in repairs down the line. As pros at ContractorLink.pro, we've seen it all—from minor leaks turning into major floods to outdated systems causing inefficiency. In this post, we'll walk you through exactly what happens during a typical home plumbing inspection, so you know if your plumber is doing a thorough job. Think of it as peeking under the hood of your home's vital water system.
A standard inspection usually takes 1-3 hours, depending on the home's size and age. Licensed plumbers use tools like cameras, pressure gauges, and dye tests to uncover problems you can't see with the naked eye. Whether you're prepping for a home sale or just maintaining peace of mind, understanding the process empowers you to ask the right questions and spot red flags.
Starting Outside: The Exterior Check
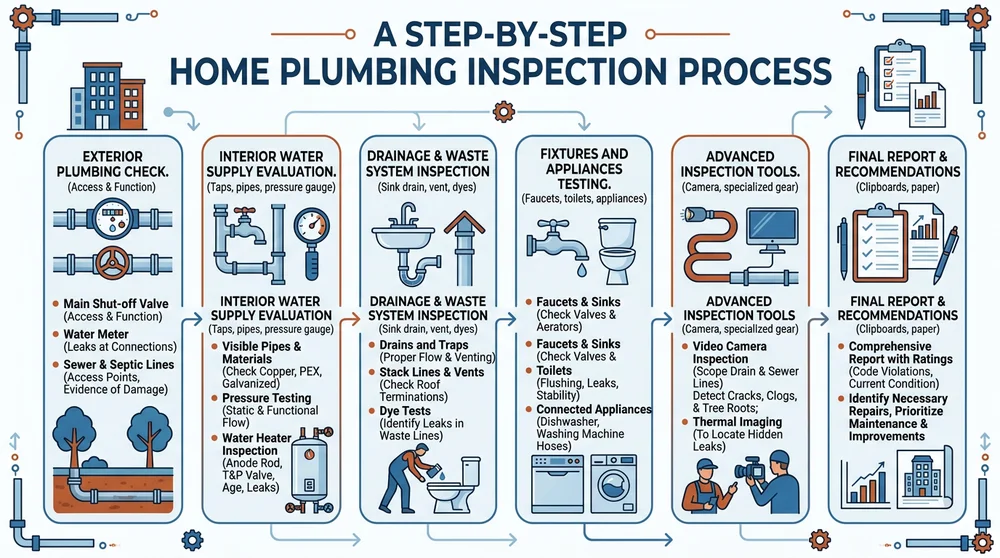
Plumbers don't dive straight into your bathrooms—they begin curbside. The exterior inspection focuses on your home's connection to the municipal water supply and sewer lines, which are often the most overlooked parts.
First, they'll locate your main water shut-off valve, usually near the street or in the basement. They'll test it to ensure it works smoothly—no stuck valves during an emergency! Next comes the water meter. By shutting off all indoor water and checking for movement, the plumber can detect hidden leaks pulling water without your knowledge.
Sewer lines get a close look too. If accessible, they'll inspect the cleanout plugs (those capped pipes sticking out of the ground). Pouring water or using a snake, they check for backups or blockages. In older homes, tree roots invading clay pipes are a common culprit—plumbers might use a sewer camera here to snake through up to 100 feet and spot cracks or collapses.
Pro Tip: Before the inspection, clear any landscaping around access points. If you're in a flood-prone area, ask about sump pumps or backflow preventers, which prevent contaminated water from entering your supply.
This outdoor phase reveals about 30% of issues, like corroded service lines that could lead to low pressure or contamination. Homeowners, note any soggy spots in your yard—these could signal underground leaks.
Inside the Home: Water Supply System Deep Dive
Moving indoors, the plumber shifts to your water supply lines. These carry fresh water from the meter to every faucet and appliance. Expect them to trace pipes through walls, attics, and crawlspaces—yes, it can get dusty!
They'll check the main water line entering your home for material and condition. Galvanized steel pipes from the 1950s? They're prone to rust and scaling, restricting flow. Modern homes use copper or PEX (plastic), which are more durable but can still suffer from bursts in freezing temps.
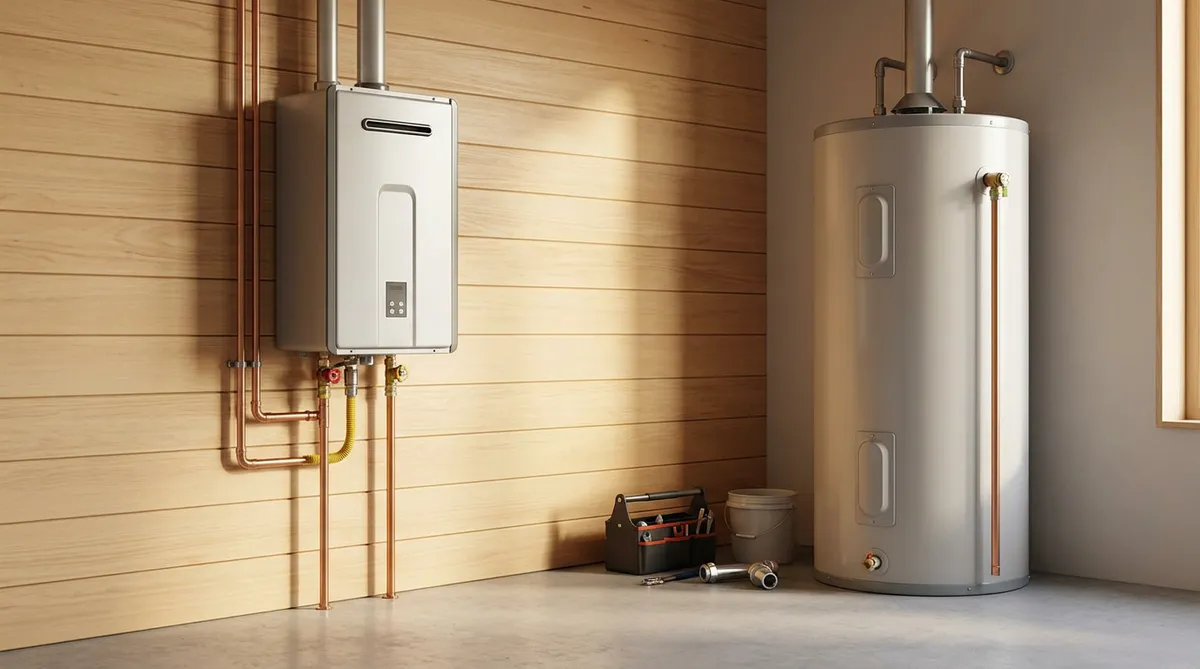
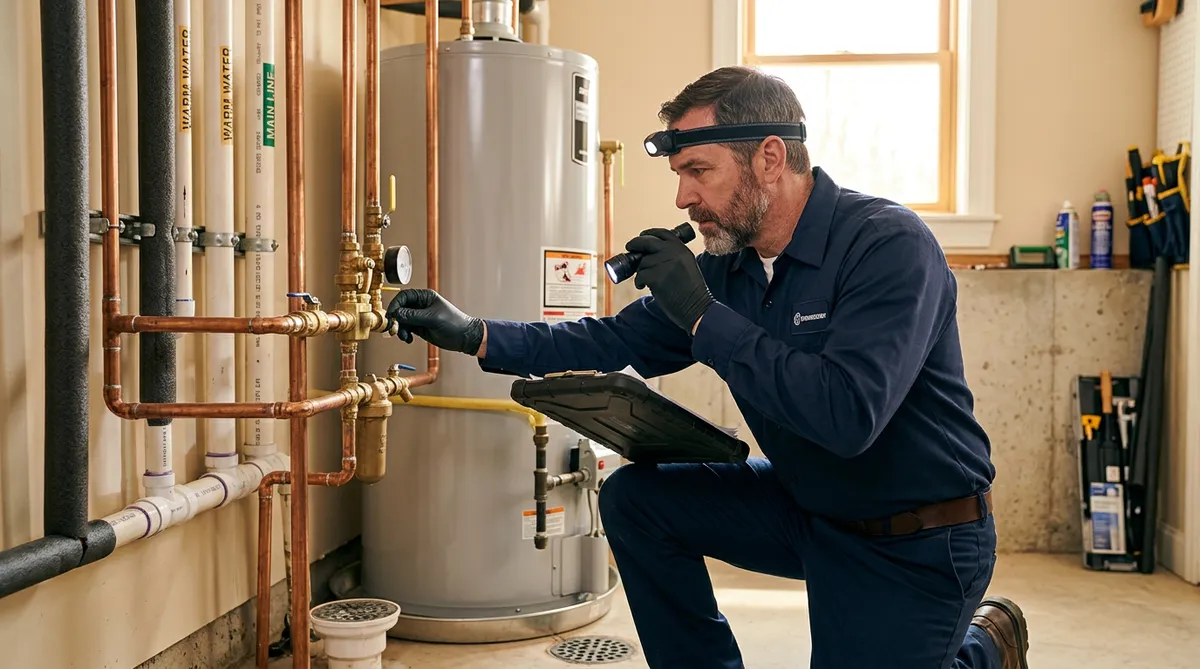
Pressure testing is key: A gauge measures PSI (pounds per square inch). Ideal is 40-80 PSI; too high risks pipe bursts, too low means clogs or leaks. They'll also inspect the water heater—age, leaks, and sediment buildup. A 10-year-old tank? It might be inefficient, costing you extra on bills.
Branch lines to sinks, toilets, and showers get scrutinized for drips, corrosion, or improper installations. In slabs (concrete floors), they listen for unusual noises or use thermal imaging to detect hidden leaks without tearing up floors.
Practical Advice: If your home has lead solder from pre-1986 builds, request a lead test. It's rare now, but peace of mind is worth it. To prepare, list any low-pressure areas you've noticed, like weak showers— it helps the plumber prioritize.
Drainage and Waste: The Dirty Work
No inspection is complete without eyeballing the drains. This covers everything from your sewer main to the smallest sink trap.
Plumbers start with a visual sweep: Are drains slow? Backing up? They'll run water in all fixtures and watch for backups. Dye tests in toilets or sinks can reveal cross-connections, where wastewater sneaks into clean lines—a health hazard.
Vent stacks (pipes running through your roof) are crucial for airflow, preventing gurgling or siphoning. A blocked vent from bird nests or debris? It spells trouble. They'll climb up (safely!) to check, and might smoke-test the system to find leaks in seals.
In basements or crawlspaces, floor drains and sump pits get attention. For septic systems (common in rural areas), they'll inspect the tank for sludge levels and leach field for saturation—no camera needed, just good old probing.
Homeowner Hack: Avoid flushing wipes or grease before the visit; it can mask real issues. If you hear gurgling drains, that's a vent problem—mention it upfront.
This section often uncovers 40% of problems, like collapsed drains from age or poor installation. In remodels, plumbers ensure new fixtures tie into existing lines without code violations.
Fixtures and Appliances: Hands-On Testing
Now for the fun part—testing what you use daily. Plumbers turn on every faucet, flush every toilet, and run every appliance to check flow and function.
Sinks and showers: Look for leaks under cabinets or around bases. Faucet aerators get unscrewed to check for mineral buildup, which reduces efficiency. Toilets? They'll dye the tank water and wait 15-30 minutes to see if it seeps into the bowl— a silent leak wasting 200 gallons a day!
Dishwashers, washing machines, and garbage disposals: Hoses checked for cracks, drains for proper traps. Hot water dispensers or whole-house filters? Inspected for maintenance needs.
In bathrooms, expect a peek behind vanities and under tiles for hidden moisture, which breeds mold. Kitchens get extra scrutiny for grease traps and high-use wear.
Expert Insight: Modern codes require anti-scald valves on showers—test yours by feeling for sudden temp changes. If appliances are old, the plumber might flag energy hogs; consider upgrades for savings.
This hands-on phase ensures nothing's overlooked in daily use, catching issues like worn washers that lead to drips.
Advanced Tools and Hidden Issues
Not every inspection is visual—pros bring tech to the table. Sewer cameras (snake-like with lights and lenses) thread through pipes, beaming live video of interiors. Cracks, bellied lines, or offsets from earthquakes show up clearly.
Hydro-jetting might demo-clean a section if needed, but usually, it's diagnostic. Pressure gauges, moisture meters, and even acoustic leak detectors listen for hisses in walls.
For gas lines (if your plumbing includes them), they'll sniff for leaks or use electronic detectors—safety first!
Tip for Buyers: In home purchases, request video footage from the inspection. It documents issues for negotiations and future reference.
These tools turn guesswork into facts, especially in homes over 20 years old where pipes hide surprises.
Wrapping Up: The Inspection Report and Next Steps
At the end, you'll get a detailed report—photos, videos, and recommendations. Good plumbers grade issues: immediate fixes (leaking main), soon (clogged vents), or monitor (aging water heater).
Costs? $200-500 typically, but it pays off. If problems arise, prioritize: Water damage spreads fast.
As contractors, we advise annual checks for older homes. Spot issues early, and you'll avoid the flood of regrets. Your plumbing keeps life flowing—treat it right.