Signs Your Attic Insulation Is Costing You Money: Ice Dams, Uneven Temps, and High Bills
Why Attic Insulation Matters More Than You Think
As homeowners, we often blame our HVAC systems when things feel off—maybe the house is too hot in summer or freezing in winter, or those utility bills just keep climbing. But here's a pro tip from the contractors at ContractorLink.pro: the real villain might be lurking up in your attic. Poor or insufficient insulation isn't just uncomfortable; it's quietly draining your wallet. In this post, we'll dive into the key signs that your attic insulation is the culprit behind ice dams, uneven temperatures, and skyrocketing bills. We'll also share practical steps to inspect and address the problem, so you can reclaim your comfort and savings.
Attic insulation works like a thermal barrier, keeping heat inside during winter and outside during summer. When it's inadequate—whether due to settling, damage, or age—it allows conditioned air to escape and outdoor elements to infiltrate. According to the U.S. Department of Energy, proper insulation can reduce heating and cooling costs by up to 20%. So, if you're feeling the pinch, let's troubleshoot like pros.
Sign #1: Ice Dams Forming on Your Roof
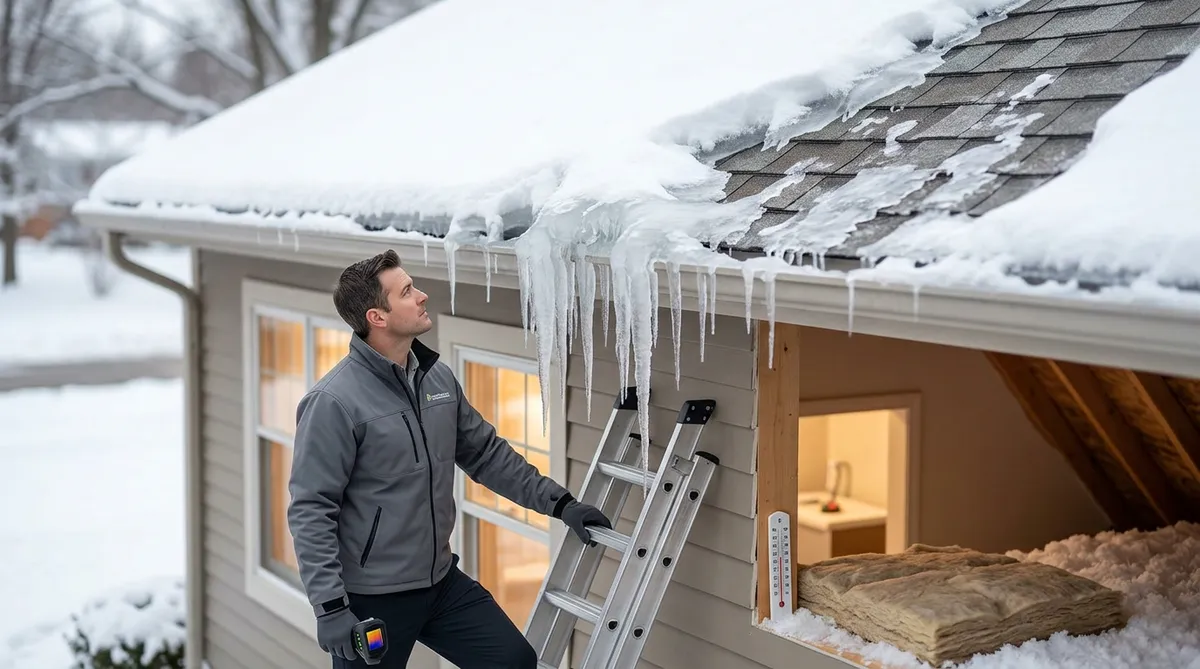
Nothing says winter headache like ice dams—those treacherous ridges of ice that build up along your roof's edges, potentially causing leaks and structural damage. If you've spotted them after a snowstorm, don't rush to call your roofer or HVAC tech. Ice dams are a classic red flag for insulation woes.
Here's how it happens: Warm air from your home rises into the attic, melting snow on the roof from below. That meltwater refreezes when it hits the colder eaves, forming a dam that backs up water under shingles. The root cause? Inadequate insulation allowing too much heat transfer, combined with poor attic ventilation.
Practical Check: Head to your attic on a mild winter day (safely, with proper footing). Feel for warm spots near the roof— if the underside of the roof feels warmer than expected, your insulation isn't doing its job. Look for gaps or thin spots in the insulation material, like fiberglass batts that have compressed over time.
To prevent this, aim for an R-value of at least R-38 in most U.S. climates (that's about 10-14 inches of fiberglass). If your insulation is below that, consider adding blown-in cellulose or rigid foam boards. And don't forget ventilation: Ensure soffit and ridge vents are clear to let cold air circulate. Fixing this now could prevent thousands in roof repairs down the line.
Sign #2: Uneven Room Temperatures Throughout Your Home
Ever notice one room in your house is a sauna while the next feels like an icebox? This inconsistency isn't always a sign of a faulty thermostat or ductwork—it's often attic insulation letting heat escape unevenly.
In winter, poor insulation means warm air leaks out through the ceiling, pulling in cold drafts from uninsulated areas. In summer, hot attic air seeps down, making upper floors unbearable. Homeowners frequently mistake this for HVAC inefficiency, but a quick insulation audit can reveal the truth.
Pro Inspection Tip: Use a thermal imaging camera if you have one (affordable models start at $200), or simply hold your hand near ceiling fixtures and outlets on a cold day. Feel drafts? That's air leakage. Check for recessed lights or fans that penetrate the ceiling—these are common bypasses if not properly sealed.
To even things out, seal air leaks with caulk or foam sealant around wires, pipes, and chimneys. Then, top up your insulation to the recommended depth. For example, if you have a cathedral ceiling, ensure baffles are in place to maintain airflow. We've seen homeowners drop their temperature swings by 5-10 degrees just by addressing attic issues, making the whole house feel balanced without cranking the AC or heat.
Sign #3: Energy Bills That Keep Climbing Despite HVAC Tune-Ups
High utility bills are the silent killer of budgets, and they're often the last sign you notice because they creep up gradually. If you've serviced your furnace or AC recently and bills are still through the roof, point your suspicions upward.
Attic insulation failures mean your HVAC system works overtime to compensate for lost efficiency. The EPA estimates that homes with poor insulation lose up to 25% of their energy through the attic alone. It's not the blower fan or compressor failing—it's the unchecked heat loss turning your dollars into hot air (literally).
DIY Bill Analysis: Compare your bills to last year's same month, adjusting for weather. A 10-15% unexplained increase? Time for an attic peek. Measure your current insulation depth with a ruler—subtract any sagging, as settled insulation loses effectiveness. Also, watch for moisture stains on ceiling drywall; damp insulation compresses and insulates poorly.
The fix? Calculate your needs using online R-value calculators from Energy Star. For colder climates, go for R-49 or higher. Blown-in insulation is a contractor favorite for even coverage without the hassle of batts. One client we connected with saved $300 annually on heating after upgrading—proof that insulation pays for itself fast.
Other Telltale Signs of Attic Insulation Problems
Beyond the big three, keep an eye out for these subtler indicators:
Drafts and Whistling Sounds: On windy days, listen for air sneaking through cracks. Feel around attic access hatches; they're often uninsulated culprits.
Pest Activity: Rodents or insects love thin insulation for nesting. Droppings or chewed material? It's a sign of vulnerability.
Visible Wear: Frost on attic nails in winter or excessive dust on floors below points to poor sealing.
Higher Humidity Levels: Inadequate insulation can lead to condensation, fostering mold growth. Use a hygrometer to check—aim for 30-50% indoor humidity.
If you spot two or more, it's time to act. These issues compound, turning minor inefficiencies into major expenses.
How to Inspect Your Attic Insulation Like a Pro

Inspecting your attic doesn't require a contractor's toolkit—just safety gear and curiosity. Start by dressing in long sleeves, gloves, and a dust mask to avoid fiberglass irritation. Use a sturdy ladder and flashlight; never step on ceiling joists to avoid falling through.
Locate the Access Point: Most homes have a hatch in the hallway ceiling or garage. Insulate it too—add weatherstripping and a layer of insulation on top.
Assess Depth and Type: Shine your light across the floor. Fiberglass should be fluffy and even; spray foam should be intact without cracks. Measure in several spots—unevenness means settling or poor installation.
Check for Leaks and Damage: Look for tears, wet spots, or animal intrusions. Seal any gaps with expanding foam.
Evaluate Ventilation: Ensure vents aren't blocked by insulation. A rule of thumb: 1 square foot of vent per 150 square feet of attic space.
If it's overwhelming or you suspect asbestos in older homes (pre-1980s), call a pro via ContractorLink.pro. We connect you with licensed insulators who can perform a blower door test for precise leak detection.
Steps to Fix Your Attic Insulation and Reclaim Your Savings
Once you've identified the issues, don't delay—winter is coming, and so are those bills. Start small:
Seal First: Use mastic tape on ducts and caulk on penetrations. This alone can boost efficiency by 10%.
Add Insulation: For DIYers, rent a blower machine from a home center for cellulose or fiberglass. Layer new material over old for better performance.
Upgrade Ventilation: Install ridge vents or gable fans if needed to prevent moisture buildup.
For bigger jobs, like removing old insulation or adding rigid boards, hire experts. Costs range from $1-3 per square foot, but rebates from utilities or programs like the Inflation Reduction Act can offset expenses.
In our experience, well-insulated attics not only slash bills but also extend HVAC life by reducing strain. One homeowner reported a 15% drop in energy use after a simple upgrade—imagine what that adds up to over a decade.
Wrapping Up: Don't Let Bad Insulation Snowball Your Costs
Ice dams, uneven temps, and high bills aren't just annoyances—they're symptoms of attic insulation that's past its prime. By spotting these signs early and taking action, you can transform your home's efficiency and comfort. Remember, the pros at ContractorLink.pro are just a click away for personalized advice or connections to local experts. Your attic might be out of sight, but getting it right puts money back in your pocket where it belongs.