How to Winterize Your Pipes (and What Happens If You Don't)
Winter's chill can turn a cozy home into a watery nightmare if you're not prepared. As contractors who've seen our share of frozen pipes and frantic homeowners, we at The Pipeline know that winterizing your plumbing isn't just a chore—it's a smart investment in your home's integrity. In this guide, we'll walk you through the why, the how, and the what-ifs of pipe protection, drawing from years of on-the-job experience. Whether you're a DIY enthusiast or just looking to avoid calling in the pros at 2 a.m., these tips will help you stay ahead of the freeze.
The Hidden Dangers: What Happens If You Don't Winterize Your Pipes
Picture this: It's a frigid January night, temperatures plummet below freezing, and your pipes—those unassuming lines running through your walls and under your floors—start to feel the squeeze. Water inside expands as it turns to ice, putting immense pressure on the pipes. For every cubic inch of water that freezes, it expands by about 9%, which is enough to crack even sturdy materials like copper or PVC.
If a pipe bursts, you're looking at immediate flooding. Water gushes out at up to 7 gallons per minute from a half-inch pipe under normal pressure, turning your basement, kitchen, or bathroom into a swimming pool in minutes. The average burst pipe repair costs between $500 and $4,000, depending on accessibility and damage extent. But that's just the start. Water seeps into walls, floors, and insulation, leading to mold growth that can make your home unhealthy and require remediation costing thousands more.
We've responded to countless calls where homeowners skipped winter prep. One client in the Midwest ignored the forecast and woke up to a foot of water in their living room—ruining hardwood floors and forcing a full remodel. Insurance might cover some, but deductibles and premiums often rise afterward. And don't forget the structural risks: Repeated freezing can weaken foundations or compromise your home's framing over time. The lesson? Prevention is far cheaper and less stressful than cure.
Why Pipes Freeze: Understanding the Basics
Not all pipes are created equal when it comes to winter vulnerability. Exposed pipes in unheated areas like garages, basements, crawl spaces, or exterior walls are prime targets. Older homes with outdated insulation or homes in regions with prolonged sub-zero temps face higher risks.
Freezing happens when temps drop to 20°F (-6°C) or lower for several hours. It's not just outdoor pipes; indoor ones can freeze if your thermostat dips too low during a power outage or vacation. As pros, we always advise treating your plumbing like it's part of the family—keep it warm and protected.
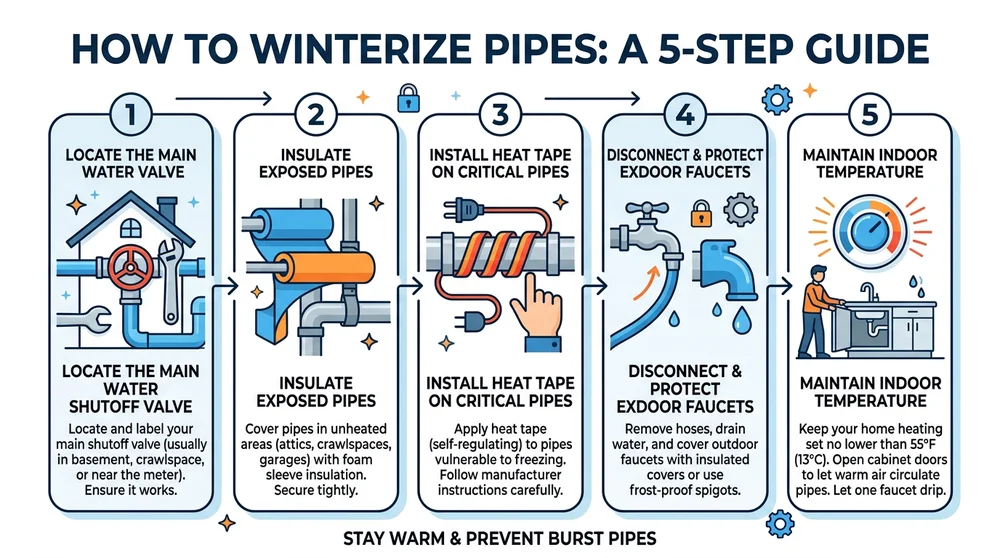
Step-by-Step Guide: How to Winterize Your Pipes Like a Pro
Winterizing doesn't require fancy tools or a contractor's license; with some basic supplies and a weekend afternoon, you can safeguard your system. Gather these essentials: pipe insulation (foam sleeves or wraps), heat tape or cable, duct tape, a hairdryer or space heater (for emergencies), and possibly a pipe wrench for shutoffs. Let's break it down.
1. Know Your Shutoff Valve and Drain the System
Start by locating your main water shutoff valve—usually near the water meter or where the supply enters your home. If you're in a freezing climate and leaving town, turn it off and drain the pipes. Open all faucets (hot and cold), flush toilets, and open drain valves on your water heater and boiler if applicable. This removes standing water, preventing ice formation.
Pro tip: Test your shutoff valve now, while water's flowing. A stuck valve can turn a simple task into a flood. If it's finicky, call a plumber for a tune-up—better safe than sorry.
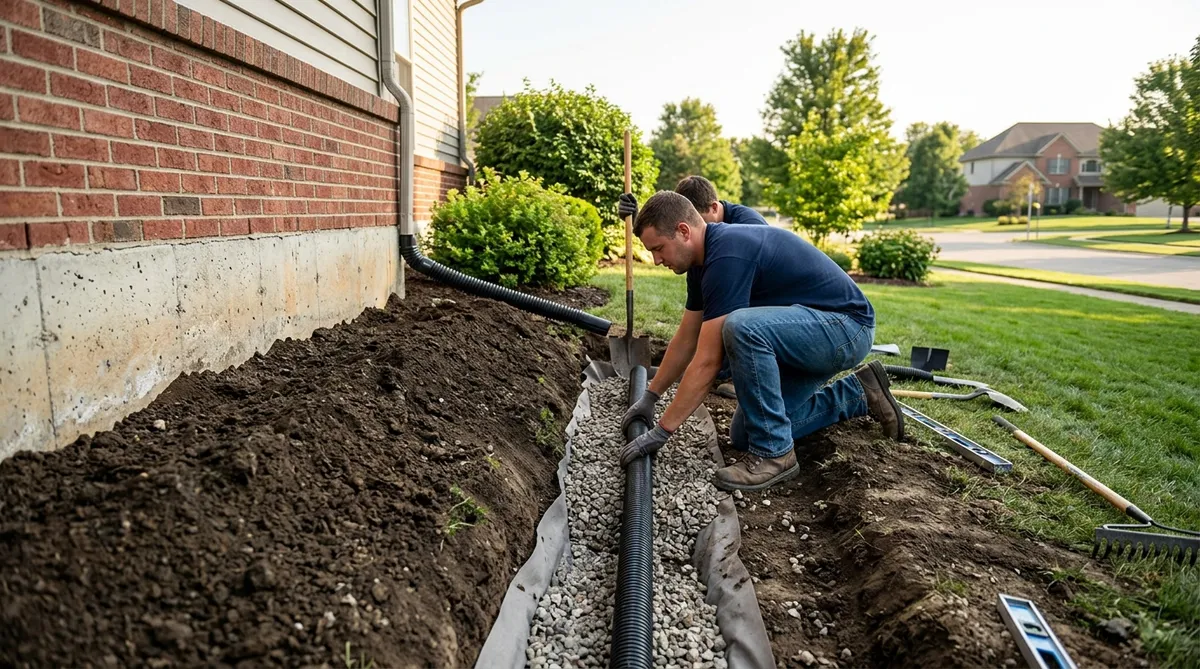
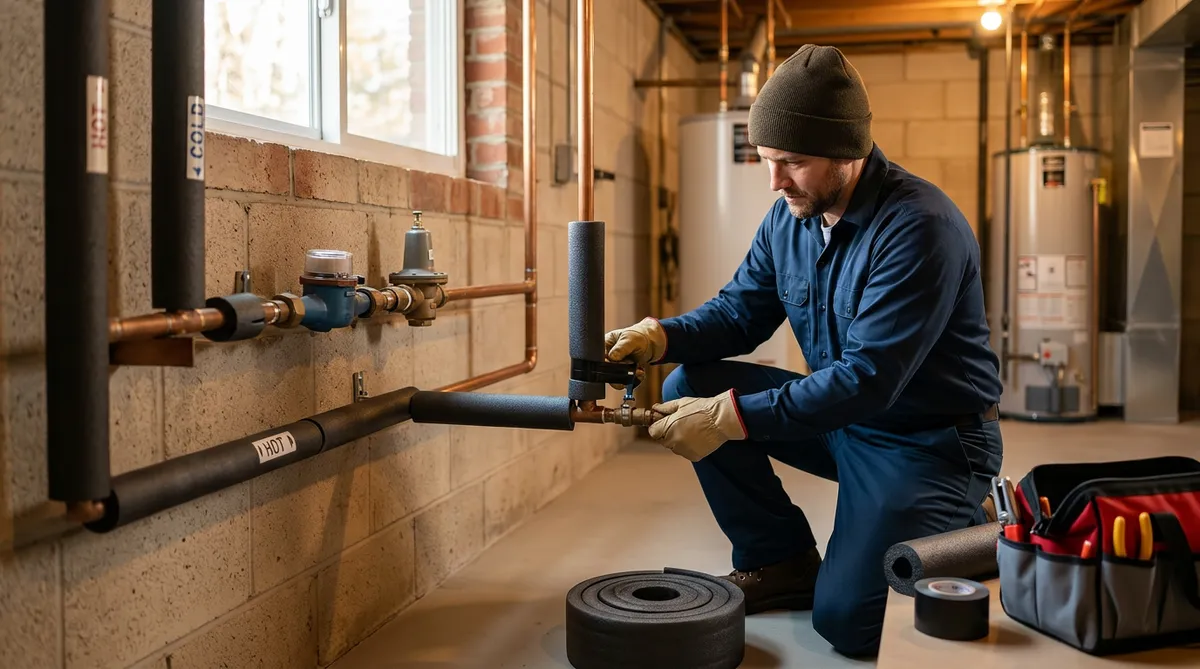
2. Insulate Exposed Pipes
Insulation is your first line of defense. Focus on pipes in attics, basements, and against exterior walls. Slide foam pipe sleeves over straight sections; for elbows and valves, use pre-formed foam covers or wrap with fiberglass insulation tape, securing it with duct tape.
For metal pipes, which conduct cold faster, add an extra layer. We've found that a simple $20 insulation kit from the hardware store can cover 50 feet of pipe and pay for itself in avoided repairs. Avoid electrical tape alone—it's not thick enough for sustained cold.
3. Install Heat Tape for Extra Protection
Heat tape, or self-regulating heating cables, wraps around pipes and plugs into a grounded outlet, automatically adjusting warmth to prevent freezing. It's ideal for hard-to-insulate spots like outdoor spigots.
Installation is straightforward: Wrap the tape in a spiral (every 6 inches or per instructions), plug it in, and test. Use only UL-listed products to avoid fire hazards. In our experience, heat tape has saved many a rural homeowner from pipe disasters during polar vortexes.
4. Protect Outdoor Faucets and Hoses
Those hose bibs (outdoor faucets) are often the first to freeze. Disconnect and store hoses indoors—frozen hoses can burst and spray water back into your foundation. For the faucets themselves, shut off the indoor valve supplying them, drain residual water by opening the outdoor spigot, and cover with an insulated foam cap.
If your faucets have anti-siphon valves, ensure they're functional; they prevent backflow. A quick $10 cap can make all the difference, and we've seen unprotected ones crack, leading to indoor leaks.
5. Maintain Indoor Temperatures and Monitor
Keep your thermostat above 55°F (13°C), even when away—use a programmable one for efficiency. Seal drafts around windows and doors to keep cold air out. During extreme cold snaps, let faucets drip slightly; the trickle keeps water moving and less prone to freezing.
Install a water leak detector or smart home sensor for early alerts. As contractors, we recommend these for peace of mind, especially in older homes.
Common Mistakes to Avoid When Winterizing
Even with the best intentions, pitfalls abound. Don't forget the water heater—drain it if shutting off the main, or insulate its pipes. Skipping the attic or crawl space? That's where many bursts hide. And never use open flames or blowtorches to thaw pipes; it's a fire risk. If you do find a freeze, thaw slowly with warm (not hot) towels or a space heater from a safe distance.
Another no-no: Ignoring mobile homes or apartments. RVs and condos have unique setups—consult your manual or a local pro. We've fixed too many 'quick fixes' that caused more harm, like over-tightening insulation leading to airflow blocks.
When to Call in the Professionals
DIY covers most homes, but if your plumbing is complex (e.g., radiant heating systems or well pumps), or if you're dealing with cast iron pipes prone to cracking, bring in a licensed plumber. Signs you need help: rusty pipes, low water pressure, or a home built before 1980 with potential asbestos insulation.
A pre-winter inspection runs $100–$300 and can spot issues early. In our line of work, we've prevented countless headaches by advising this simple check.
The Long-Term Payoff: Why Winterizing Matters Year After Year
Winterizing isn't a one-and-done; make it annual ritual. It extends your plumbing's life, saves on energy (insulated pipes retain heat better), and keeps your home value intact. Homeowners who prep rarely face the disruption of repairs, letting them enjoy winter's beauty without worry.
From the pros at ContractorLink.pro, remember: A little effort now beats a lot of regret later. Stay warm, stay dry, and here's to a freeze-free season.