Can Your Hardwood Floors Be Refinished or Is It Time for a Full Replacement?
Hardwood floors add timeless warmth and value to any home, but over time, they show signs of wear from foot traffic, pets, spills, and everyday life. As a homeowner, you might stare at those scratches and dull spots, wondering: Can I just refinish them, or are they beyond saving? The good news is that many hardwood floors have life left in them, but it boils down to a few critical factors. From our years on the job at ContractorLink.pro, we've seen it all—floors that bounce back beautifully after a sand and refinish, and others that need a full tear-out for safety and aesthetics. In this post, we'll break down the essentials: floor thickness, cupping, water damage, and how many sands your floors have left. Armed with this knowledge, you'll make an informed call without wasting time or money.
Why Floor Thickness Matters for Refinishing
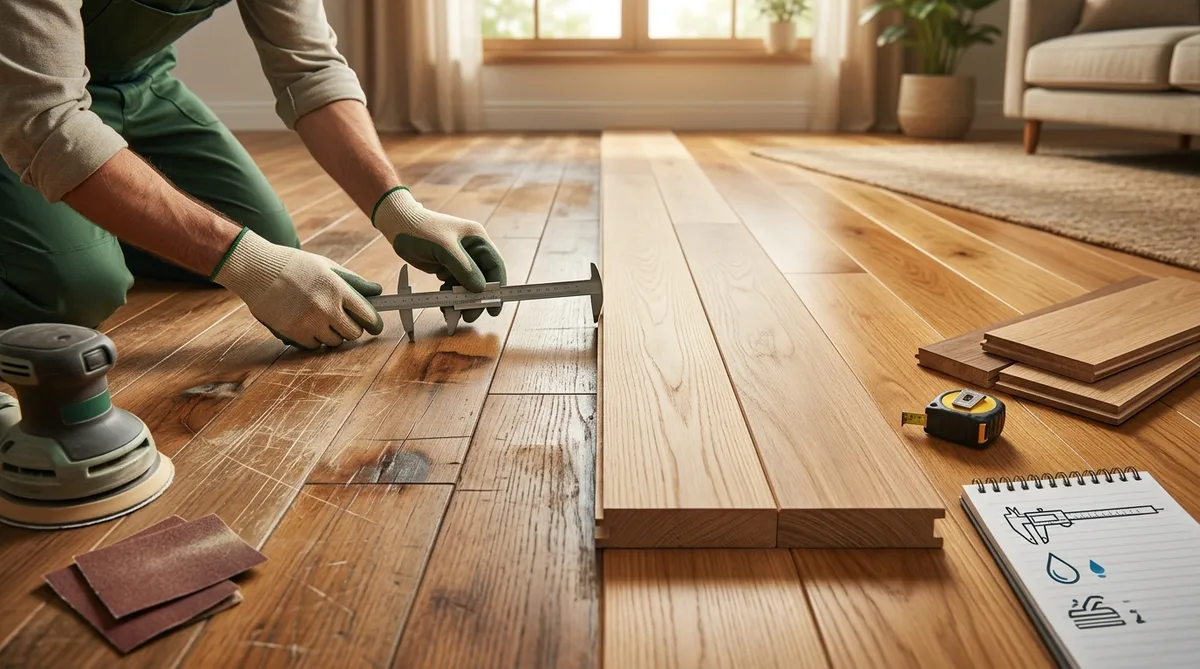
One of the first things we check when assessing hardwood floors is their thickness. Solid hardwood planks typically start at 3/4-inch thick, while engineered hardwood might be thinner, often around 1/2-inch or less with a veneer layer on top. The key here is the wear layer—the top portion that can be sanded down without compromising the floor's integrity.
For solid hardwood, you can usually refinish it three to five times, each time removing about 1/16 to 1/8 inch of material. But if the planks are already down to 1/2-inch or less, it's risky. Sanding too thin can make the floor unstable, leading to squeaks, cracks, or even buckling under pressure. Engineered floors have a thinner wear layer—sometimes just 2-4mm—so they might only handle one or two refinishings before the plywood core is exposed.
Practical Tip: Grab a small drill bit or consult a pro to measure the thickness. Remove a baseboard in a low-traffic corner and use a ruler or caliper to gauge the plank depth. If it's under 1/2-inch for solid wood, start thinking replacement. Thinner floors not only limit refinishing but can also pose safety issues, like splintering or uneven surfaces that trip you up.
We've refinished countless homes where owners thought their floors were toast, only to find plenty of meat left on the bone. But ignoring thickness can lead to costly mistakes—sanding too much and voiding warranties or needing emergency repairs.
Spotting and Fixing Cupping in Hardwood Floors
Cupping is that frustrating curl at the edges of your floorboards, where the center dips and the sides rise like a shallow taco shell. It's usually caused by moisture imbalance: too much humidity below the floor (from a crawlspace or flood) makes the wood expand on the bottom, pushing the top edges up. Dry conditions can cause reverse cupping, but the former is more common in homes.
Mild cupping might be refinishable if caught early. We often see it in older homes with seasonal humidity swings. The fix? First, address the moisture source—improve ventilation, fix leaks, or add a dehumidifier. Then, sanding can level the floor, but only if the cupping isn't severe (more than 1/8-inch gap under the plank).
Severe cupping, however, signals deeper issues. If the wood has warped permanently or the adhesive has failed, refinishing won't hold. You'll notice gaps between boards or a bouncy feel underfoot. In these cases, replacement is wiser to prevent further damage, like mold growth or structural weakening.
Pro Advice: Test for cupping by sliding a piece of paper under the edges—if it fits easily, it's minor and fixable with refinishing. For DIY moisture checks, use a moisture meter (available for under $20 at hardware stores). Aim for 6-9% moisture content in the wood; anything over 12% means drying out before any work. We've saved many floors by stabilizing humidity first, but pushing through with cupped boards often leads to callbacks and unhappy clients.
Navigating Water Damage on Your Hardwood Floors
Water damage is the arch-nemesis of hardwood floors. A one-time spill might just need a quick wipe and dry, but prolonged exposure—from floods, leaks, or poor drainage—can wreak havoc. Surface stains or discoloration might be cosmetic and refinishable, but deeper penetration causes swelling, delamination (in engineered floors), or rot.
Look for black spots (mold), soft spots when you press down, or a musty smell—these are red flags. If the damage is localized, like from a burst pipe in one room, we can often cut out and patch the affected boards, then refinish the rest. But widespread water damage? It compromises the entire floor's stability. Subfloor rot or buckling joists might require full replacement to avoid health risks and costly future repairs.
Engineered floors fare worse with water since the layers can separate, making refinishing impossible. Solid wood is more resilient but still vulnerable if saturated for days.
Homeowner Hack: Act fast after water exposure—remove rugs, fans on high, and open windows. For assessment, lift a loose board or hire an inspector with a thermal camera to detect hidden moisture. If the wood feels spongy or crumbles, it's time to replace. In our experience, attempting to refinish water-damaged floors leads to peeling finishes and recurring issues. Better to rip it up and start fresh with moisture barriers in place.
How Many Sands Does Your Floor Have Left?
Every hardwood floor has a finite number of sands—think of it as the wood's nine lives. Each refinishing removes a layer to erase imperfections, but you can't go forever. Solid oak or maple might endure four to six full sands over decades, depending on original thickness and care. But if your floors are 50+ years old and have been refinished twice already, they might be on their last legs.
To gauge remaining sands, consider the wear patterns. Deep gouges from furniture or pets eat into the wood faster, reducing options. We use a simple rule: If more than half the wear layer is gone (visually, the grain looks shallow), stop sanding and replace. For engineered, it's even stricter—once the veneer is compromised, you're done.
Maintenance plays a big role too. Regular sweeping, felt pads under furniture, and avoiding harsh cleaners preserve those sands. Neglect it, and you'll burn through them quicker.
Expert Insight: Count the layers of finish buildup; multiple thick coats suggest previous sands. A pro can drum test (tapping for hollow sounds) to estimate remaining depth. We've extended floor life by years with proactive care, but over-sanding is a common regret—leading to thin, fragile boards that crack under normal use.
Other Signs It's Time to Weigh Refinishing vs. Replacement
Beyond the big four, watch for widespread scratches that penetrate the finish, large gaps from shrinkage (over 1/16-inch), or squeaks indicating loose nails. Allergens trapped in old finishes or outdated styles (like dark stains in modern homes) might tip the scales toward replacement for health or aesthetic reasons.
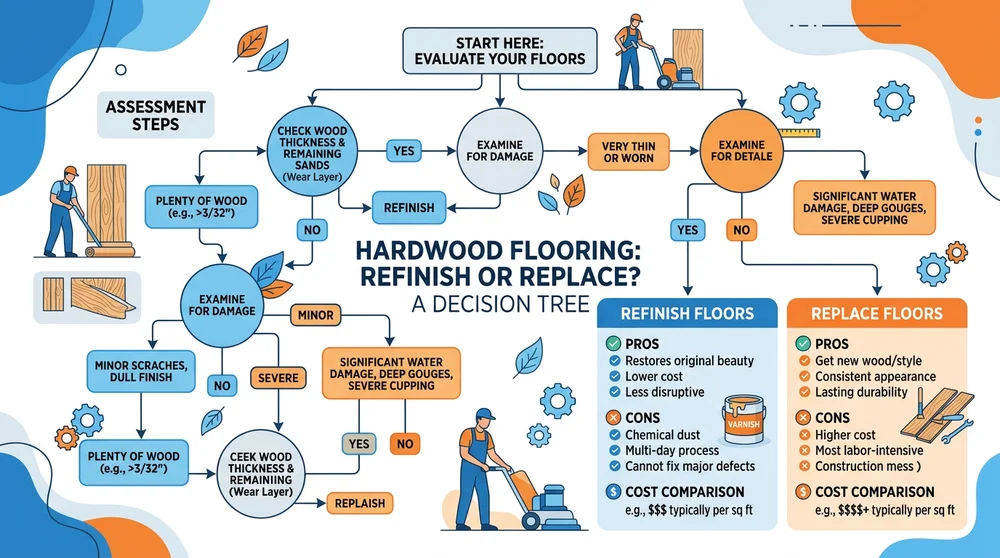
Refinishing pros: Cost-effective (about $3-5 per sq ft vs. $8-15 for new), eco-friendly (reuses materials), and quicker (a week vs. weeks for install). Cons: Dust, disruption, and temporary results if underlying issues persist.
Replacement shines for severe damage, thinner floors, or when upgrading to wider planks or eco-options like bamboo. It future-proofs your home but involves demo mess and higher upfront costs.
Decision Framework: Score your floors—if thickness is good, cupping minimal, damage superficial, and sands remain, refinish. Otherwise, replace. Always get multiple quotes from licensed pros via ContractorLink.pro to compare.
Final Thoughts from the Pros
Deciding between refinishing and replacing your hardwood floors doesn't have to be a guessing game. By evaluating thickness, cupping, water damage, and sand potential, you can revive your floors or invest in a fresh start that lasts. We've helped thousands of homeowners avoid pitfalls, turning potential headaches into beautiful, durable spaces. Remember, the best choice preserves your home's character while ensuring safety and longevity. If in doubt, a quick inspection can clarify everything.